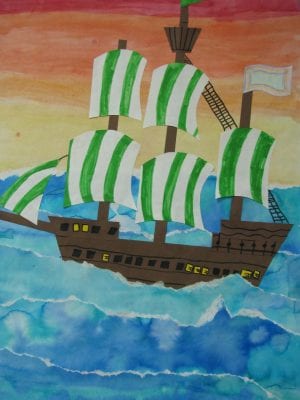
First Fleet Inspired Ships
6th August, 2018
Part 1 – Create the 2 watercolour backgrounds
Blue ocean waves:
- Use one A4 paper, and work fast! You want the paper to stay moist throughout the process, without getting soggy. Put your name on the back before you start.
- Brush the whole page lightly with water
- Use a combination of light and dark blue paints (slightly thinned with water) and paint them onto the page in a swirly pattern
- While wet, sprinkle the page with salt unevenly for a cool effect
Sunset sky:
- Use the top 1/2-2/3 of an A3 paper in portrait (up and down) orientation. Again, you’ll need to work fast and moist, with your name on the back first. Keep in mind that the bottom part of the paper will be covered up with torn strips of waves later, once everything is dry.
- Lightly brush the page with water. Start with the lightest, brightest colour (probably yellow) and paint a wide stripe around the horizon (where the sea and sky will meet.
- Get your next lightest colour (probably orange) and paint another wide stripe above the first. Make a smooth join between the stripes by overlapping both colours, and using the water to help you blend.
- Repeat, working up the page adding wide stripes of colour, and then blending until you reach your darkest colour at the top of the page, furthest away from the setting sun at the horizon.
Part 2 – Create the ship, and assembly the parts
- Use a piece of A4 paper to follow the video tutorial and draw your own ship. Make it big! Don’t worry about the rope lines, as you’ll be cutting the ship out later.
- Colour and decorate.
- Cut out the ship. You may need to cut parts out separately and re-assemble them when you stick them together. That’s totally fine and much easier than trying to cut around every awkward shape.
- Roughly tear the blue ocean into wavey strips. Lay out the strips to cover the white part of your sunset background. Tuck your ship into location, being sure to overlap a blue strip over the bottom line of the ship.
- Stick it all together.
- Draw on any rope lines or unclear details – consider if you need to use a black outline to make it ‘pop’.
- Trim and mount your artwork
UPDATE


Dear Ms Salmon,
WOW! The art works are turning out great.l really love the boats.Yours is amazing.
Don’t they look amazing sailing across our window? 🙂